This describes the process to change details on your email account
Your passwords
Your username
Server information
Changing ports
Changing security options (SSL)
Document Summary
The process should take no more than fifteen minutes. No tools are required.
Document Detail
On the iPad/iPhone, to change the settings for an email address do the following:
Click Settings
Click “mail”
Click on “Accounts”
Click the Email Account
In the “Incoming Mail Server” block you can
Modify the Hostname (if different to what you have been given)
Modify the password to a new value
In the “Outgoing Mail Server” block click on the SMTP value to get another screen
Either click again on the Outgoing Server value to get the settings, or at the bottom of the screen, click on “Add server”.
In this new screen, you can
Modify the outgoing server (if different to what you have been given)
Modify the password to a new value
SSL is usually off, and the port number should be set to 587 (especially if abroad) or 2525 if 587 appears to be blocked. You can turn this on if required.
Click on Save, which returns you to the previous screen.
It might ask to set up without using SSL. Answer “Yes”.
It might then say that it “Cannot verify” but click on “Continue” or “Done” anyway until you get ticks.
Please download the document to follow the instructions
This document explains how to set up an IMAP or POP email address on android devices.
Document Summary
Adding your email address should take up to 5 minutes.
Document Detail
Navigate to your phone’s Settings
Android devices can vary, the following gif shows how to navigate on a Samsung Galaxy A12 however the menus on other android devices are very similar. (e.g. ‘Passwords and accounts’ could replace ‘accounts’)
Navigate to “Accounts”
Navigate to “Manage Accounts”
Navigate to “Add Account”
Select “Personal (IMAP)”
Please see the below-animated picture showing the instructions above. The animated picture starts here:
You can pause the picture by clicking on the pause button in the centre when you hover your mouse over it, or in the bottom left if you have clicked anywhere else in the picture.
Next we set up the account information.
Enter your email address
Select Set up manually/Manual Setup
Select the option relevant to you (IMAP or POP3)
Enter your password
Change the incoming server to the server you were given, e.g. mail10.extendcp.co.uk
Select Next
Change the outgoing server to the server you were given, e.g. mail10.extendcp.co.uk
Select Next
Select Next again on the new screen.
Here you may change your account name and your display name
Changing the account name will only affect what it looks like in your mail application on your phone
Changing your display name will display this value when people receive messages from you
Select Next
Please see the below-animated picture showing the instructions above. The animated picture starts here:
You can pause the picture by clicking on the pause button in the centre when you hover your mouse over it, or in the bottom left if you have clicked anywhere else in the picture.
It should then finish setting up your email account making it available in your mail app.
Please download the document to follow the instructions
This document explains how to set up an exchange email address on android devices.
Document Summary
Adding your email address should take up to 5 minutes.
Document Detail
Please read our knowledgebase article on the differences between the 3 different types of mailboxes. There is a separate document that explains how to use Outlook to access IMAP/POP mailboxes.
Navigate to your phone’s Settings
Android devices can vary, the following gif shows how to navigate on a Samsung Galaxy A12 however the menu’s are very similar. (e.g. ‘Passwords and accounts’ could replace ‘accounts’)
Navigate to “Accounts”
Navigate to “Manage Accounts”
Navigate to “Add Account”
Select “Exchange”
Please see the below-animated picture showing the instructions above. The animated picture starts here:
You can pause the picture by clicking on the pause button in the center when you hover your mouse over it, or in the bottom left if you have clicked anywhere else in the picture.
This document explains how to set up a new email address on Microsoft Outlook using the control panel.
Document Summary
The setup should take approximately 5-15 minutes.
Document Detail
This document describes two ways of accessing your mailbox. IMAP and POP. Please read our knowledgebase article on the differences between the 3 different types of the mailbox. There is a separate document that explains how to use Outlook to access an Exchange mailbox.
IMAP
All email is stored on the server
You will need archiving if the mailbox gets full
Best to use if you are planning to access the mailbox on multiple devices
POP3
All email is downloaded and removed from the server after a set amount of days (Default is 14 days)
All emails are stored on the main computer that the mailbox is set up on
Can be accessed from multiple devices but there is no synchronizing between them
Best used if you are only using a computer and are expecting large, or a large number of emails
Once you have decided the type of email you want we want to set the email up.
Note: This can be done within Outlook, but there are situations that do not work then the mailbox is setup within Outlook.
Open ‘Control Panel’, and click on the control panel icon.
On the ‘View By’ option, change it to ‘small icons’.
Click on ‘Mail’. (It may be different depending on your software, but always says ‘mail’)
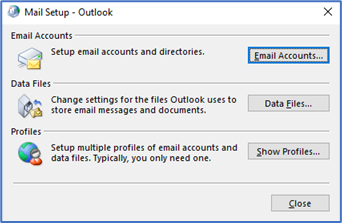
Click on Email Accounts
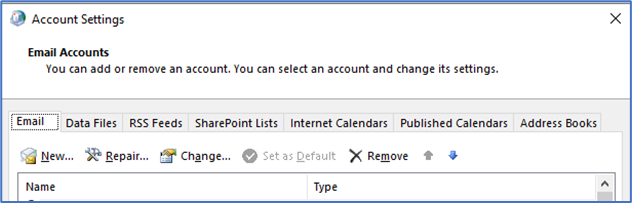
Then click on ‘New’ on the left-hand side.
Click on ‘Manual setup or additional server types‘ then click next.
Choose ‘POP or IMAP’ then click next.
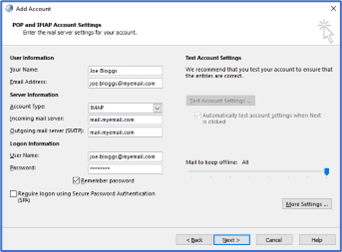
Fill in the information we provide you once your account has been activated.
Account type – the account type you chose (POP3 or IMAP)
Incoming/Outgoing mail server – the email server information provided (e.g. mail.myemail.com)
Login information – Username is your email address
Click on more settings…
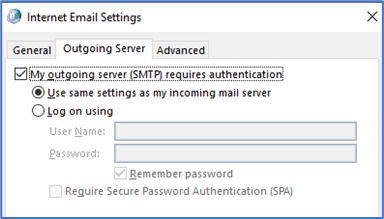
In the Outgoing Server tab, tick the box next to ‘My outgoing server(SMTP) requires authentication’
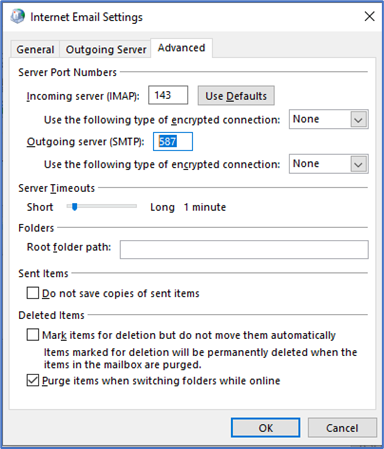
For IMAP please do the below:
In Advanced
Change the Incoming server (IMAP) to 143 and change the Outgoing server (SMTP) to 587
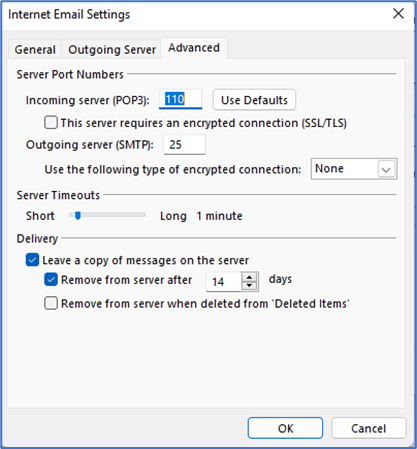
For POP email please follow the below:
Change the Incoming server (POP) to 110 and change the Outgoing server (SMTP) to 25
Then make sure on both types (IMAP and POP) encrypted connection is selected as ‘None’.
Click OK.
Click next.
It is here the connection to the server will be tested and a test email sent to your mailbox.
If there are any issues, it is possible that the information entered in the Add Account screen may be incorrect (e.g. the server, or your password) however if everything is correct, there should be no issues. Open up MS Outlook and your email will be ready to use.
If you require any assistance please contact RJS Consultants on 01923 254302.
RJS Consultants have successfully delivered the first phase of a KPI Database to one of their major clients; This phase allows all the staff to assign the hours that they have worked to their respective clients. The Database Application, which is both web-based and Windows based, monitors that staff have entered their working hours, and if not entered, an email is automatically sent reminding them of their omission.
The second phase is now under construction to calculate a client’s profitability.